Showing posts with label picture dump. Show all posts

Friday, June 15, 2012

Sarah's Fancy Stir-Fry Ramen

So, due to popular demand, I am going to cook for you guys today. Better yet, I am going to teach you guys how to turn this:
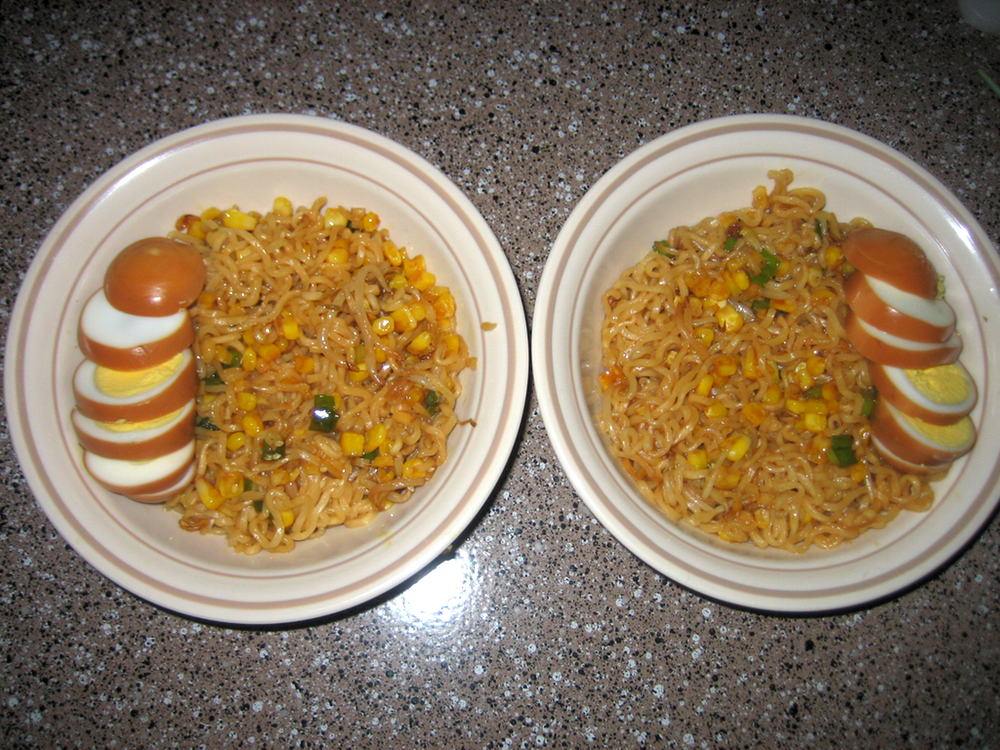
 Into this:
Making ramen exciting is a particularly handy skill when:
  1. You're a poor, starving writer
  2. Any money you do get is going towards buying a couch before the big sale ends
  3. You're eating instant ramen all the time anyway
  4. You have that faint hope that your ramen tasted different for once
I'm sure we've all been there at least once. Am I right? *crickets chip* Yeah . . . I'm totally right. So let me teach you guys how to spice up instant ramen!

Sarah's Fancy Stir-Fry Ramen
In order to make this delicious meal for two people, you will need:
  • 2 packets instant ramen
  • 2 hard boiled eggs (peeled)
  • Delicious veggies of your choice
  • Sesame oil
  • Soy sauce
  • Rice vinegar
  • 1 clove garlic (minced)
  • 1 green onion stalk (chopped)
  • Fresh ginger (minced)
  • Sesame seeds
Yes, you may notice the distinct lack of measurements in that ingredient list. This is because cooking this dish consists mostly of winging it. But don't worry, everything will turn out okay.

Right-o. To start with, we're going to make shoyu eggs, as seen on the excellent Japanese food blog, Just Bento. Why eggs in a noodle dish? They add protein and I love them.

To make these babies, you're going to need some soy sauce and your hard boiled eggs. In this case, I have 2 eggs and 2 tablespoons soy sauce. Heat the soy sauce in a small pan. Once it starts foaming, add the eggs and roll them around with a spoon so they get evenly coated in the soy sauce. When they're done, they'll look something like this:
Yum! Remove from the pan and chill in fridge. This will let the soy sauce set a little bit and make the eggs easier to slice later.

Next, pull out your delicious veggies. In this case I'm using ½ cup frozen corn and ½ cup canned bean sprouts, but I'm also a huge fan of Asian stir fry frozen veggie medleys. Pretty much anything can work though--peas, carrots, brocoli, edamame, water chestnuts, cabbage, etc. Just sauté the veggies of choice in a little butter until they're all warm and delicious. Set aside.
Now it's time to get the actual noodles out of the way. If you're feeling particularly skilled, you can do this while you're sautéing the veggies. If not, well, it's not big deal. Just place the ramen noodle bricks in boiling water, cook until done, strain, and set aside.
For a quick recap: at this point we've made shoyu eggs, sautéed our delicious veggies, and cooked our noodles. Next comes the sauce, which will tie the entire dish together. You will need all of this stuff:
Top row: sesame seeds, rice vinegar, soy sauce, and sesame oil.
Bottom row: ramen seasoning packets (chicken flavor), minced garlic, chopped green onions, and minced ginger.

Okay, so it looks a little intimidating (and expensive), but it's not that bad. Really. The bottled ingredients will last you quite a while and the fresh ingredients are A) not that expensive, and b) add a kick that their powdered counterparts lack.

So to get this started, add the garlic, ginder, and a dollop of sesame oil to your pot. When making this sauce I usually adjust ingredients based on taste, so unfortunately I'm not going to be much help when it comes to measurements. The thing about most of these ingredients is that, while having more or less of one will change the flavor of your sauce, it won't ruin the dish. Don't be afraid to experiment--too much or too little of something never killed anyone.

Anyway, I like to cook the ginger and garlic in the sesame oil until they get soft and a little browned. This seems to help the flavors come out and make them taste delicious. . . but I really have no idea what I'm talking about. Just do it.
Once that's done, it's time to add the rest of your ingredients. Start off with a splash of soy sauce and rice vinegar. You want to have enough liquid to cover your noodles, so make sure to at least cover the bottom of your pot. Mix in some sesame seeds and the two ramen seasoning packets until everything is well combined. Add the green onions and give them the opportunity to soften a little. This is a good time to taste test and adjust the levels of sesame oil, soy sauce, and rice vinegar to get the perfect flavor.
When everything is to your satisfaction, add the cooked veggies that you set aside earlier. Get them all nice and covered in sauce, and then add your noodles. When you're mixing everything, make sure to get the noodles completely covered in sauce. You should have little to no liquid left over and your noodles will visibly change color when they are properly sauced (feel free to compare the color in this next image to the image of the cooking noodles above).
Almost done! Dish out your lovely creation into two bowls. Cut the shoyu eggs we made earlier up into pretty slices and place along the side of your bowl. And look at that, you're done!
Now doesn't that look delicious? Of course it does! Alternatively, if you're feeling particularly ambitious, you can pan fry up some chicken tenders in a little sesame oil and soy sauce, slice them up like the eggs, and have another element to your noodles.

So, how do you guys feel about instant ramen? Is it one of those foods that you avoid like the plague? Have you ever had the opportunity to eat real ramen in Japan? And, most importantly, do you have any alternative ramen recipes worthy sharing? Tell me in the comments!

Friday, October 21, 2011

The long-belated crochet post

Well, this week has been serious. Time for something lighter!

Crafty-times! Now, unfortunately, the last time I did a crafty-times post was back in June. Which is a bit unacceptable. And is also an explanation for why this post is a bit . . . long. *shifty eyes*

Right.

So, back in July I started working on one of these awesome tartan potholders from the September/October issues of Crochet Today! Unfortunately I wasn't considering yarn thickness, so my potholder turned out huge. It's more of a trivet than anything else. But here, observe anyway:
See . . . it's a potholder bigger than my head!
The backing is supposed to be felt, but it's been a bit impossible to find any felt that's an appropriate color . . . which means I might have to dye it. Or just crochet an entire back . . . which sounds kind of nightmarish, considering how much I despise working with cotton.

And, uhh, as long as we're talking about things that need backings, I'm sort of making myself African flower coasters. Why? Well, I have a lot of random yarn leftover from my awesome blanket, and decided to make an african flower. It happened to be the size of a coaster. See:
African flowers are kinda like granny squares . . . only different.
A lot of people make blankets and stuff from African flowers, but I'm not sure I could handle that. It's a lot of stitches for a rather small space. Which is why I'm going for coasters. :) However, on the blanket front, I'm seriously considering this sexy, plaid blanket. I love the red/white/blue yarn combo, but I might go with Green Bay Packers colors too . . . because I need a football blanket. This is important.

Anyway. At about the same time I was working on the "potholder," I made myself a quick case for my portable harddrive. It was super cute until I decided to correct a small mistake and accidentally ripped out the chain stitches and destroyed EVERYTHING.
It's more of a "sleeve" right now.
Yeah. Haven't quite figured out how to fix this without it looking crappy. But I'm sure I'll figure it out. Eventually. Just trust me when I say that it looked better when it was in one piece. Speaking of pieces . . . Totoro is close to being finished! I just have to sew all of his pieces together!
Limbs, limbs EVERYWHERE!
Of course, sewing pieces together is my least favorite part of the entire process. Which is why you aren't getting a new, exciting picture of the mouse crobot . . . since, uhh, I still haven't sewn him together. *fail* And I, uhh, guess I should admit that I haven't worked on the dragon scarf either. *even more fail*

But let's talk success now, shall we?

First, remember that yellow birdie from so long ago? Well, I spruced him up a bit!
He's totally ready for a night on the town!
Yeah, okay, so the sprucing wasn't 100% intentional. I'd made a top hat for a project mentioned below and it was waaaaay too small . . . so the bird got a classy upgrade. I think it gives him the character that he was seriously lacking.

And now you want something better than the bird? Well, let me tell you about the Cathulhu I modified from this pattern. The story goes like this: I crocheted a Cathulhu for my friend Kirstin's birthday. What's a Cathulhu? Well, it's a pun on cat and H.P. Lovecraft's Cthulhu. The most important part is that it's adorable. Observe in the (relatively old) pictures:
Note the red cat collar hidden beneath the tentacles.
And a back shot so you can see the awesome wings and tail.
Kirstin, btw, adored it (and you can see her indulgent post on the matter here). :3 And now I've been teaching her to crochet . . . which has been entertaining. We're both making the dragon from this Chinese Zociac amigurumi set. Kirstin's still working on hers, but since I have speed and experience on my side, my dragon is currently in pieces:
Me and pieces? We're like this: *crosses fingers*
How did I start talking about a project with pieces that need to be sewn together again?! Jeeze, moving on . . . again . . . and for good this time.

Now, it you've ever perused my Tumblr, you might have noticed that I have a bit of a love affair with calaveras skulls. Well, it's really all kinds of skulls, but calaveras skulls are my favorite. There's just something cool about that aesthetic . . . the Mexico/Dia de los Muertos levels on LittleBigPlanet were some of my favorite in the game. Anyway, several weeks ago I decided to modify this skull pattern and create my own Dia de los Muertos bride and groom!
They're . . . nowhere near done.
The groom is the skull with all of the designs. I also have a top hat with a purple hatband that I haven't attached yet, and after that he'll be finished!

The bride is the difficult part. She'll be getting eyes along with similar designs on her, uhh, face, along with a veil. The veil will be made from crocheted roses and white tulle. If you're curious, my experiments with the crocheted roses have been kind of nightmarish, but have thus far produced these two specimens:
Still deciding whether the small rose is STILL too big. >_>
The big issue here is getting things the right size . . . which is actually how the yellow birdie ended up with his top hat. Hopefully I'll manage to get these done by Halloween.* Wish me luck?

And that's all for now. What do you guys think? I'm partial to the skulls . . . but that's me. :) Also, have any of you worked on any exciting, non-writing related projects in the last few months? Tell me about them in the comments!
Monday, September 5, 2011

Pretty pictures! And my WIP!

I've always wanted to do a WIP picture spam post.

The idea is that you've collected a bunch of relevant images to inspire your writing. Or, in my case, you've collected a bunch of images after the fact that remind you of why you love your WIP when editing. All in all, there are pretty pictures involved, so I'm sharing them with you guys, okay?

Red Rock Canyon
Image credit to J-a-x
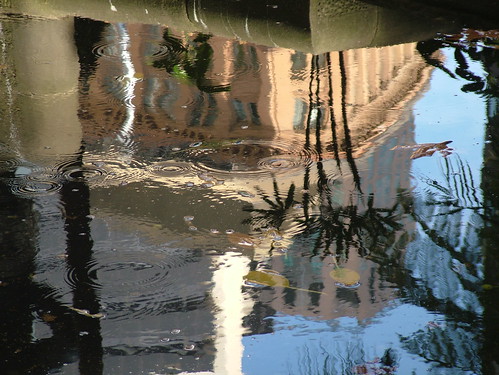
a moment in a fountain
Image credit to ducktourer
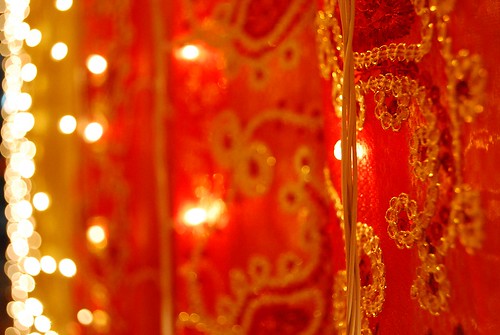
an intricate glow
Image credit to abhishakey
Desert Sunset
Image credit to Shrimaitreya
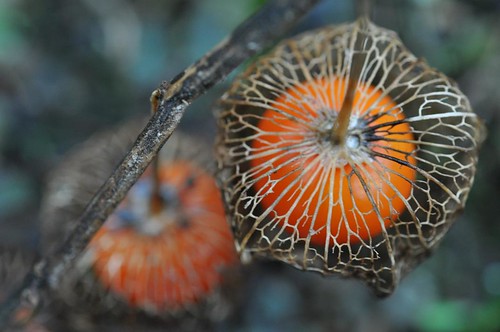
Elderly Chinese Lantern
Image credit to Super Cool Japanese
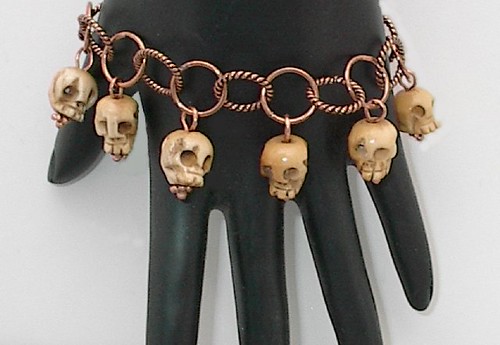
Day of the Dead Skull Bracelet Carved Bone Charms
Image credit to sparkler923
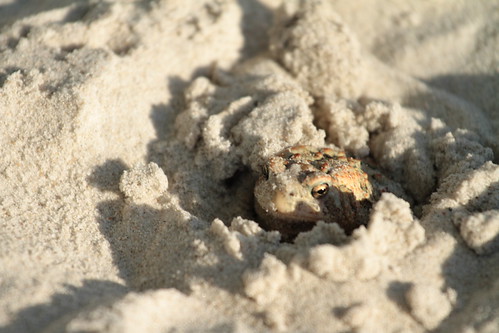
burrowing sand toad
Image credit to buflyer200
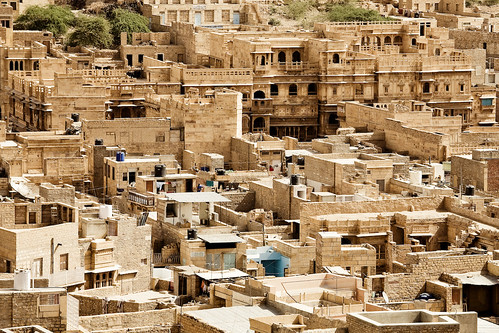
Jaisalmer, the sandstone city
Image credit to fabian-f
Orange Asiatic Lily
Image credit to twg1942
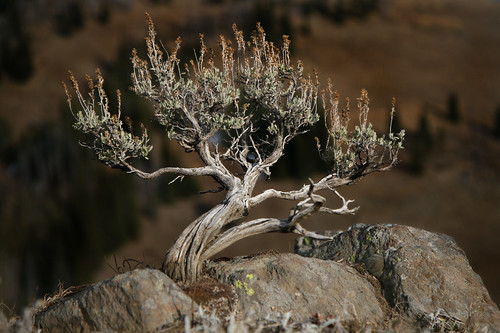
Sagebrush Bonsai
Image credit to Joe Stylos
oil lamps
Image credit to clementinejam
Gears 3
Image credit to adametrnal
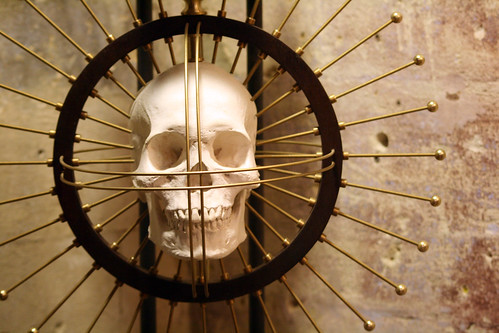
skull with metal rods
Image credit to Serenae
Just inside me.
Image credit to Sea-of-Ice
Woo! So what do you think? Did this post tell you everything that you ever wanted to know about my WIP? Also, have you ever done a WIP picture spam post? If so, leave me a link in the comments--I'd love to see what you've collected! And, uh, if not, you should go do one, because it's pretty fun. :)

Friday, May 27, 2011

Yellowstone: Animal explosion!

Okay, here's the last of the three Yellowstone National park picture dump posts, and I promise I will get back to talking about writerly things on Monday. Until then, I'm going to throw some wildlife pictures in your direction.

One of the most abundant things you'll see in Yellowstone are buffalo (or, if you prefer, bison). They're everywhere. Seriously. Traffic has slowed to a drizzle? There be buffalo in the road. You look out into the distance and see some brown blobs on the hill? They're buffalo. And they look something like this:
Isn't the baby adorable? They get together in groups and frolic too. :)
After the bison, you'll probably start seeing elf everywhere. They're characterized by their white butts. The black blobs in the distance are pretty much always buffalo and the white blobs are usually elk butts. Of course, both elk and buffalo do hang out by the road, as evidenced in these pictures.
Lady elk chilling out in Mammoth Hot Springs.
Elk with antlers in velvet. They were GIGANTIC.
After the buffalo and the elk, the animal selection is free game. Somedays you can go to Yellowstone and see little to nothing. On other days you can turn every corner and find something new and exciting. One of those exciting things might be big-horned sheep, which aren't nearly as domesticated and dumb as the average sheep.
See that white dot in the center way at the bottom of the picture?
It's a massively pregnant bighorn sheep! That climbed down a cliff face!
And this was a bachelor herd, just chilling in the picnic area. 
Just look at the horns on this sucker. Holy crap!
Now, this next bit is something special because it's something that I've never seen in Yellowstone before: river otters! There are only three otters in the picture, but it was a group of four and they were porpoising upriver.
I cannot come close to quantifying how adorable the otters were.
Now, you might be wondering how I managed to see all of these different animals. Well, you can blame the wolves that were reintroduced into the park. My family is full of wolf people, and once you spend an extended period of time looking for one animal, you start to learn where everything else hangs out too.

While I did see several wolves, they were way too far away to get any decent photos. But to satiate your inner canine cravings, I present to you the less illustrious coyote:
He was just taking a stroll down the side of the road.
For reference, coyotes are a lot smaller that wolves and don't live in packs. They're also found all around North America, so if you're lucky, you can see one anywhere. Even in big cities.

Anyway, now to some birds, because birds are also pretty cool. I have several different bird pictures, but I'm only going to subject you to two. All you need to know is that one of them was crazy and would hang out at a specific window on a specific trailer in our campground for days on end. The other bird is just pretty.
Mountain bluebird--I love how bright they are!
Crazy Bird aka the red-shafted flicker.
Well let's wrap this up, shall we? It's time for the bears! If you were following my tweets, then you'll know I saw a ridiculous number of them. Unfortunately, I wasn't really thinking about taking pictures on the 12 bear day (I was too busy being excited), but I did my best later on.

Now what you need to understand is that most of the time when you see bears in Yellowstone, they're pretty far away. My parents both have spotting scopes, which definitely helps, but it's not too picture friendly. For example, check out these two grizzly bears:
There are some brownish dotes near the top of the left side.
Yeah. Not too great, hmm? However, there are other times which are a bit more exciting, so first, let's look at some black bears:
Black bear that was taking an afternoon nap.
A cinnamon colored black bear that was grazing on grass.
This was actually on a steep incline right next to the road. O_O
Aren't they cute? I love their round ears.

But I sense that you guys might be wondering something though. If some black bears can be brown, then how do you tell the difference between a cinnamon black bear and a grizzly bear?

Well, for one thing, grizzly bears are much bigger and they have a hump. They also like different environments. Black bears can climb trees and you can usually see them in wooded areas. Grizzlies, on the other hand, can't climb trees, and are often seen in wide, open spaces. Observe:
This is a female dubbed "Bling." She has a radio collar and two ear tags. :P
Another grizzly. Note the hump. Also, digging about for munchies.
So what do you think? My pictures aren't all that fantastic (animals don't necessarily like to pose), but I think some of them turned out okay. I also got pictures of a blue heron, a nesting sandhill crane, a female spruce grouse, a male spruce grouse that was in the middle of rutting, mule deer, and some pronghorn. However, I figured that this post was already long enough, you know? Either way, tell me what you guys think in the comments.